-
Skip Ahead
- Download Google Chrome
- Install the WalkMe Extension
- Setup User Access to Matchforce
- Log in to Matchforce
- Username and Password Recovery
To get started using Matchforce, follow these steps:
1. Download Google Chrome
Google Chrome needs to be downloaded and installed on your computer prior to proceeding with the setup and access of Matchforce.
The full and proper functioning of Matchforce requires the use of Google Chrome. It can be downloaded here.
2. Install the WalkMe Extension
Matchforce uses an application called WalkMe to provide help and training within the system. Before you access Matchforce for the first time, download and install WalkMe on your computer within Google Chrome.
- Open Google Chrome.
- Click here.
- Follow the instructions provided.
3. Setup User Access to Matchforce
There are three steps to adding users to Matchforce in AMS. The sections that follow explain how to complete each of the three steps. All three steps must be completed for each Matchforce user. Failure to complete any of the following steps may result in improper provisioning and restricted Matchforce access for users.
3.1. Step 1 of 3 – Setting Matchforce Profile Type
Every Matchforce user must be assigned a Matchforce Profile Type in AMS. Matchforce Profile Type controls whether or not a user can access Matchforce’s Agency Management application. Users with access to this application can complete system configuration, setup, and maintenance tasks such as turning on/off automated emails, increasing the number of required background checks, and creating new grants, referral details, sites, etc.
Matchforce Profile Type can be set to the following values:
- None: Users with this Matchforce Profile Type will have no access Matchforce.
- Agency User: Users with this Matchforce Profile Type will be able to access Matchforce and complete standard match management activities, but will not have access to the Agency Management application.
- Agency Administrator: Users with this Matchforce Profile Type will be able to access Matchforce and complete standard match management activities and will have access to the Agency Management application.
Follow these steps to set Matchforce Profile Type for a user:
- Access AMS by following the instructions in Section 2.0 of the Matchforce User Provisioning Guide.
- On the top section of the Employees tab in AMS, right click on the name of the appropriate employee. This opens a small menu of options associated with the selected employee.
- From the menu of option, select Edit Properties…. This opens a new window showing a variety of information about the selected employee.
- Scroll down to find the dropdown box titled Matchforce Profile Type.
- Set this dropdown box to the desired Matchforce Profile Type.
- Click Save.
3.2. Step 2 of 3 – Setting User Individual Permissions
There are six individual permissions that can be turned on or off for Matchforce users. These permissions are as follows:
- Matchforce Contact Merging Permission: Setting this permission to “Yes” gives the associated user the ability to merge duplicate contact records in Matchforce. Setting this permission to “No” does not give the associated user this ability.
- Matchforce Enrollment Supervisor Permission: Setting this permission to “Yes” gives the associated user the ability to move Big and Little enrollment records/applications to the Ready to be Matched stage. Setting this permission to”No” does not give the associated user this ability.
- Matchforce Match Specialist Permission: Setting this permission to “Yes” gives the associated user the ability to move a match from the Pending stage to the Active stage in Matchforce. Setting this permission to”No” does not give the associated user this ability.
- Matchforce Match Support Supervisor Permission: Setting this permission to “Yes” gives the associated user the following abilities in Matchforce. Setting this permission to”No” does not give the associated user these abilities.
- Move a match from the Pending stage to the Active stage
- Move a match from the Pending Closure stage to the Closed stage
- Change the Status field on a match from Red to Yellow or Green
- Matchforce Quality Assurance Permission: Setting this permission to “Yes” gives the associated user the ability to create, view, and edit quality assurance records in Matchforce. Setting this permission to”No” does not give the associated user this ability.
- Matchforce Match SSN Edit Access Permission: Setting this permission to “Yes” gives the associated user the ability to edit social security numbers that have been added to Matchforce. Setting this permission to”No” does not give the associated user this ability.
Follow these steps to set individual permissions for a user:
- Access AMS by following the instructions in Section 2.0 of the Matchforce User Provisioning Guide.
- On the top section of the Employees tab in AMS, right click on the name of the appropriate employee. This opens a small menu of options associated with the selected employee.
- From the menu of options, select Edit Properties…. This opens a new window showing a variety of information about the selected employee.
- Scroll down to find the six dropdown boxes associated with the individual permissions described above.
- Set each of the six dropdown boxes to the desired setting.
- Click Save.
3.3. Step 3 of 3 – Adding Users to Agency Matchforce Groups
The final step of Matchforce user provisioning is adding users to the appropriate Agency Matchforce Groups. Assignment of Agency Matchforce Groups controls which private records Matchforce users can view. A private record is a contact record in Matchforce that has been marked as private. Private records are used to hide contact information in Matchforce about high-profile individuals.
Matchforce Users can be assigned to one of the following two Agency Matchforce Groups:
- Matchforce Standard Access: Users assigned to this group can access all non-private agency records (across all locations) and access private records for which they are the owner.
- Matchforce Supervisor Access: Users assigned to this group can access all non-private agency records (across all locations) and access all private records.
Follow these steps to add users to Agency Matchforce Groups:
- Access AMS by following the instructions in Section 2.0 of the Matchforce User Provisioning Guide.
- At the top of the AMS window, click on Matchforce Groups. This opens the Matchforce Groups tab in AMS.
- In the Matchforce Groups section, right click on the group to add users. This opens a small menu of options associated with the selected group.
- From the menu of options, select Edit Properties…. This opens the Edit Group window showing the users who have already been added to the group.
- Click the green + icon. This opens a small window listing the staff who can be added to the group.
- Highlight the staff name to be added to the group and then click the Select button at the bottom of the window.
- In the Edit Group window, click Save.
4. Log in to Matchforce
If you have your username and password, let’s log into Matchforce:
- Visit BBBSA.okta.com.
- Enter your username and password.
- Click login.

Usernames are in the form of firstname.lastname (as shown in AMS) and passwords are standard BBBS passwords.
If this is your first time accessing Okta, you will be prompted to enroll in multifactor authentication (MFA). Your MFA settings can be changed at a later time.
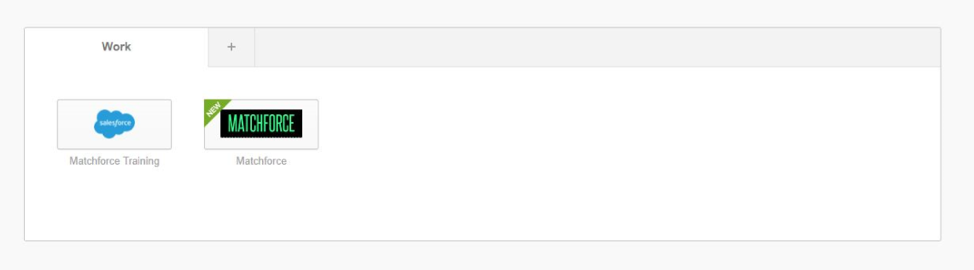
Once signed in, you will see a dashboard containing the different Matchforce environments to which you have access. Enter a Matchforce environment by clicking on the corresponding button in your dashboard. You will be prompted for multifactor authentication (MFA) to access any Matchforce environment.
Username and Password Recovery
If you forget your username, please ask your agency’s AMS Administrator. Usernames can only be recovered by your AMS Agency Administrators.
You can reset your password without contacting an AMS Administrator: How to reset your password via Okta