List Views is a powerful Matchforce tool that can help you plan your work. Contacts, Accounts, Enrollments, Matches, Match Support Contacts, and Surveys are the tabs you are able to utilize List Views.
In the following sections, we will cover how List Views can be edited and created.
Editing Existing List Views
Before a List View can be edited, it must first become a Clone. For example purposes, we will choose one List View to work with below:
- On the Navigation Bar, click the Contacts tab.
- Next to Recently Viewed click
 .
. - Select a List View, for example All Bigs.
- Click
 and select Clone.
 - Enter the necessary information and choose who can view this List View.
- Click Save.
- A Filters section will appear to the right of the List View giving you the ability to customize this List View to fit your needs. Data can be added or removed using the Filter boxes.
- When finished, click
 .
.
Did you lose your Filters section? Click
to reopen the section.
Adding and Moving Data Fields
Follow these steps to add and rearrange data fields in a List View:
- Navigate to the List View on which you want to add or move data fields.
- Click and then click on Select Fields to Display.
- In the Select Fields to Display dialog box you will see to options: Available Fields and Visible Fields.
- Using the left and right arrows, you can add and remove the fields you wish to see in your List View.
- Using the up and down arrows, you can arrange the order of the fields in your List View.
- Click Save.
Only data fields that appear on the Record Type corresponding to the List View being edited can be added to a List View. For example, only data fields appearing on a Contact Record can be added to a Contact List View.
Creating New List Views
Follow these steps to make a New List View:
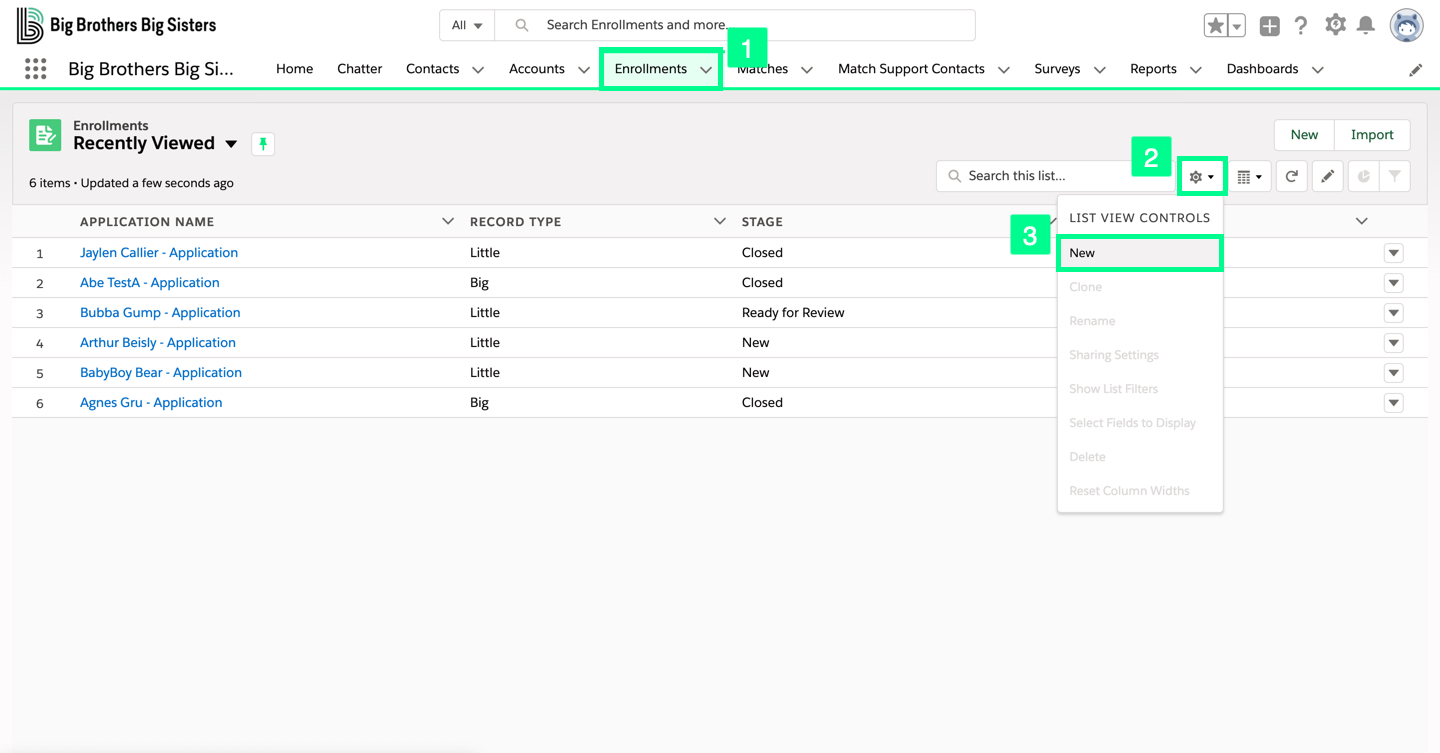
- Navigate to the List View type you wish to create. (Contact, Enrollment, etc.)
- Click and select New.
- Enter a name for your New List View.
- Click Save.
Review the instructions above to edit your New List View.